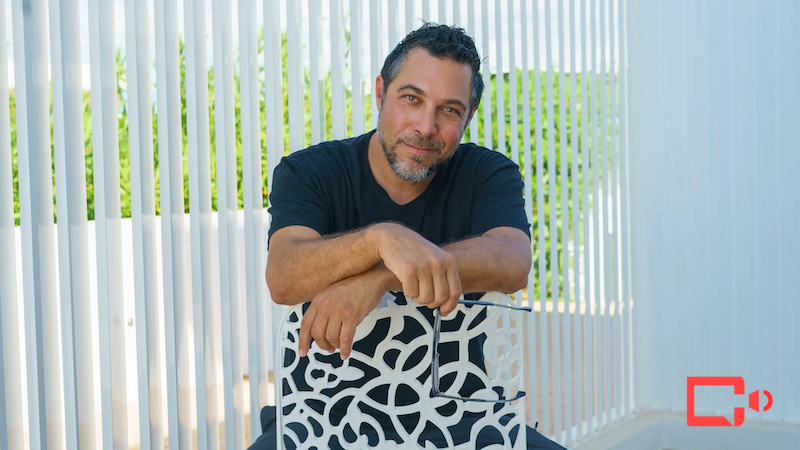
IoT - Halloween V2
Christmas Home Genie MQTT Singing Pumpkins Finite State Machine Grails IOT Groovy Automated Light Show Akka Arduino HalloweenGithub project link: https://github.com/yakoob/halloween
The Goal
When children approach the house the Pumpkin Patch comes to life providing an interactive environment based on motion and sound detection.
Service Layer

The following technologies were used:
ActorSystem:
Using Akka with a Finite State Machine DSL that various actors can implement to transition their internal state.
These actors facilitate the state of the IoT devices involved.
FSM code | FSM grammar code | preview actor code
Using the DSL is very easy.
1) Implement the FSM trait which provide the actor with an instance of a Finite State Machine.
class Projector extends BaseActor implements FSM {}
2) Configure the FSM DSL durring the initialization of your actor.
@Override void configureFsmDsl() { fsm.record().onCommands([Play]).fromState(Any).goToState(Playing).transition = { Command command -> remoteDispatch(command) } fsm.record().onCommands([Off, Pause]).fromState(Any).goToState(Paused).transition = { Command command -> remoteDispatch(command) } fsm.record().onCommands([Resume]).fromState(Paused).goToState(Playing).transition = { Command command -> if (!currentVideo || currentVideo == Video.Name.NONE) return new Guard(reason: "ineligible video for command:Resume") remoteDispatch(command) } }
3) Fire relevent messages to your Finite State Machine in your actors onRecieve method.
@Override void onReceive(Object message) throws Exception { if (message instanceof Command) fsm.fire(message) }
Android:
Enables playing and stopping of videos as well as device commands using subtitles "timedText" to have fine grain control of IoT devices... i.e: blow smoke at 1:01:02.
android singing pumpkins code | actor code
android hologram code | actor code
Arduino:
Sound Detection. arduino code | actor code
Smoke Machine. arduino code | actor code
Philips Hue Bloom(s) with Bridge:
Enables control of Hue lights [color/luminance] via a rest API. preview code
Materials / Application:
Easy Popup with two 7x11 tarpes.This provides a great platform for arranging your Pumpkin Patch. Attach the tarps to the side and back of the popup so that luminance levels can be controlled. You will also find the aluminum supporting structures useful for cable management and hanging props.
Polyurethane pumpkins from MichaelsCover one side of the pumpkin with blue painters tape and draw your spooky face. The tape serves two purposes:
- 1) provides a platform for drawing your design one or more times.
- 2) exposes freshly cut areas for spray painting black; while protecting untouched orange areas.
Install low heat lighting. - “high heat lighting will cause a fire”. I used 3W flicker flame LED’s. It is important to get them all connected to the same power cords so you can programmatically control their ON and OFF states as they will ultimately be connected to a IOT power switch and behave accordingly to our Halloween ActorSystem. Decorative hay bales from Michaels.
Stagger different sized hays bales for which to arrange pumpkins on.
Decorative Ivy from MichaelsWeave in and out of hay bales
Spider web looking cloth from MichaelsHang the webs from the ceiling and sides of the Easy Popup
Three centerpiece pumpkins for projecting singing pumpkins uponTwo Android based projectors that can be programed as desired. I have 1 projector for the singing / joke telling pumpkins and another for the backdrop hologram
Something to hide your projector inI built a box from supplies I picked up at Lowes. I left space in between side panels so the equipment inside doesn’t overheat.
The ability to detect current audio levels is valuable in creating an interactive experience. Not only does this allow for the lights to have a Color / Luminance Schema that matches your music, they will also react to sounds of trick or treaters. I’ve added a bonus that blows smoke and powers the strobe light when the sum of the last 5 received audio values exceeds a certain level.
Like the projector; the smoke machine requires physical interaction to have smoke blow on demand. The smoke machine must be powered on for about 5 minutes so that it can heat up enough to blow smoke when a switch is toggled. I decided to alway supply power so that it is in a constant ready state and mount a servo to the blow smoke switch. Now when the Halloween Actor System is in a automation on state smoke will blow every 30 seconds for 2 seconds
Load a program on your arduino to take commands via rest and translate them into commands to the servo
Christmas IOT
Actor Model MQTT Finite State Machine IOT Grails Automated Light Show Groovy Arduino AndroidThe following technologies were used:
ActorSystem:
Controls the Android tablet as well as the Arduiono-Relay Module for automation of lighting/music using Grails, Akka, MQTT, Async-REST.
preview code
LightController:
Arduino application controlling a relay module by exposing an API for various lighting methods via REST.
preview code
MediaController:
Enables playing and stopping of songs via MQTT using android sdk.
preview code
Clone from Github:
Ahmad Family - 2014
It's alive!!! ahhh... no, it's UnDead!!!

Tell your Undead Stories!!!
clone it from github
Finite State Machine DSL
Finite State Machine AkkaA continuation of my previous post... This introduction to a Finite State Machine DSL will show you how I am able to better manage event based transitional logic.
Lets focus on the InboundChannelActor "incoming call".
First we need to add an instance of a State Machine so that we can configure it when each inbound channel is initialized. I include a trait that allows me to have a new instance of a FiniteStateMachine, then I define the DSL which is added to the State Machine's transitions registry.
trait ChannelState implements Channel { public FiniteStateMachine fsm = FiniteStateMachine.newInstance(None) } class InboundChannelActor extends BaseActor implements InboundChannelState { public InboundChannelActor(String channelUuid, String destination) { this.channelUuid = channelUuid this.destination = destination // record a transition for Event: "Parked and All" from State: "None" to State: "Greeting" state_ChannelState__fsm.record().on([Parked, All]).from(None).to(None).act = { log.info("on Parked from None -> None") state_ChannelState__fsm.goToState(state_ChannelState__fsm.currentValue) } // record a transition for Event: "init" on a Greeting, state_ChannelState__fsm.record().on([Init]).from(Greeting).to(Greeting).act = { event -> // play greeting audioActorService.actorRef.tell(new Shout(channelUuid: channelUuid, audioId: state_ChannelState__fsm.currentValue.greeting.id), context.self()) // start timer for next action akkaService.system.scheduler().scheduleOnce(Duration.create(state_ChannelState__fsm.currentValue.nextStateSeconds, TimeUnit.SECONDS), new Runnable() {@Override public void run() { // go-to next state state_ChannelState__fsm.goToState(new Init(), state_ChannelState__fsm.currentValue.nextState) } }, akkaService.system.dispatcher()) } // record a transition for Event: "Init" on a Menu state_ChannelState__fsm.record().on([Init]).from(Menu).to(Menu).act = { event -> // play menu greeting audioActorService.actorRef.tell(new Shout(channelUuid: channelUuid, audioId: state_ChannelState__fsm.currentValue.greeting.id), akkaService.actorNoSender()) } // record a transition for Event: "KeyPressed" on a Menu, state_ChannelState__fsm.record().on([KeyPressed]).from(Menu).to(Menu).act = { event -> // repeat the keys back to you... speechActorService.actorRef.tell(new Speak(channelUuid: channelUuid, words: "dtmf ${event.digit}"), akkaService.actorNoSender()) } // record a transition for Event: "Hungup" on All transitions... state_ChannelState__fsm.record().on([Hungup]).from(All).to(All).act = { event -> // stop the Actor // todo: stop child actors context.stop(context.self()) } // Start the Finite State Machine with Configured Action state_ChannelState__fsm.goToState(VoiceState.findByE164(destination)) } }
Lastly... add the Akka onRecieve() method for firing events of to the state machine where we check the transitions registry for a match and "act"
class InboundChannelActor extends BaseActor implements InboundChannelState { // akka's onRecieve method... fire events to the state machine for this inbound channel instance @Override void onReceive(Object message) throws Exception { state_ChannelState__fsm.fire(message, state_ChannelState__fsm.currentState) } }
Groovy & Grails with Akka
Technology Actor Model FreeSwitch Actors Grails Traits Groovy Akka Programming- * Application built to scale up (concurrency)
- * Application built to scale out (remoting)
- * Avoid race conditions, deadlocks, live locks
- * Fault tolerance.
So the main idea with Actor Model is instead of using shared memory, messages are sent to actors who's state can only be altered by its self. A actor has a mailbox for receiving its messages. When a actor sends a message to a mailbox it's non-blocking. When a actor receives a message in its mailbox its uninterrupted. Actors act on their mailbox messages in order retrospectively.
Lets dive into a real world example using my PBX demonstration. A call is parked on my freeSwitch. I will send a message to a SwitchBoardActor who's job is to setup up new calls or route existing calls.
class FreeSwitchConnectionService { switchboardActor.tell(parked, akkaService.actorNoSender()) }
My SwitchBoardActor receives the Parked() message and knows that Parked incoming messages should create a new InboundChannelActor informing it of the Parked message so the newly created InboundChannelActor can setup its' state to receive additional messages.
class SwitchBoardActor extends UntypedActor implements ActorMaker { @Override void onReceive(Object message) throws Exception { if (message instanceof FreeSwitchEvent && message instanceof Parked) { makeInboundChannelActor(message.channelUuid, message.destination).tell(message, context.self()) } } } class InboundChannelActor extends BaseActor implements ObjectBinding { @Override void onReceive(Object message) throws Exception { if (message instanceof Parked && !message.variableActor && message.inbound { // tell freeSwitch to set the variableActor on the freeSwitch channel so the next message get routed to the correct instance of InboundChannelActor freeSwitchActorService.actorRef.tell(copyObject(message, new SetVar(key: "actor", value: self.path().toString())), context.self()) } } }
Lets have a look at subsequent messages that have the Actor Uri attached to it. i.e: DTMF events are sent into the Actor System. We decide if we want to do text to speech or play an audio.
class FreeSwitchConnectionService { KeyPressed keyPressed = copyMap(fsEventMap, new KeyPressed()) switchboardActor.tell(keyPressed, akkaService.actorNoSender()) } class SwitchBoardActor extends UntypedActor implements ActorMaker { @Override void onReceive(Object message) throws Exception { if (message instanceof FreeSwitchEvent && message.variableActor) { getContext().system().actorSelection(message.variableActor).tell(message, context.self()) } } } class InboundChannelActor extends BaseActor implements ObjectBinding { def akkaService = Holders.applicationContext.getBean("akkaService") def freeSwitchActorService = Holders.applicationContext.getBean("freeSwitchActorService") def audioActorService = Holders.applicationContext.getBean("audioActorService") def speechActorService = Holders.applicationContext.getBean("speechActorService") private boolean inputDigitTimerStarted = false private inputDigits = [] @Override void onReceive(Object message) throws Exception { if (message instanceof KeyPressed) { /* put DTMF digit into an array and start a timer. All digits in the inputDigits array will be used when timer expires.*/ inputDigits << message.digit startInputDigitsTimer() } } def startInputDigitsTimer(){ if (!inputDigitTimerStarted){ log.info( " INPUT DIGITS TIMER STARTED ") inputDigitTimerStarted = true akkaService.system.scheduler().scheduleOnce(Duration.create(3, TimeUnit.SECONDS), new Runnable() { @Override public void run() { def keysPressed = inputDigits.join("").toString() inputDigits.clear() log.info(" INPUT DIGITS ARE: $keysPressed") if (keysPressed.length()) { if (keysPressed == "1"){ speechActorService.actorRef.tell(new Speak(channelUuid: channelUuid, words: "Welcome" ), context.self()) } else if (keysPressed == "2") { speechActorService.actorRef.tell(new Speak(channelUuid: channelUuid, words: "Patching you in to com systems" ), context.self()) } else { audioActorService.actorRef.tell(new Shout(channelUuid: channelUuid, audioId: keysPressed), context.self()) } inputDigitTimerStarted = false } } }, akkaService.system.dispatcher() ) } } }
So thats the gist of my actor based PBX. Download the code on GitHub for the full picture.
You can test drive this code with WebRTC
Another thing worth noting. I'm using Grails 2.4.3 in this project which includes the latest major release of groovy which implements Traits. In the code above you see my actors implement Traits. Having the ability to do multiple inheritance is a very nice feature. i.e:
trait Channel { String channelUuid String destination String variableActor = null } class FreeSwitchEvent implements Serializable, Channel { Boolean inbound = false Boolean outbound = false } class Parked extends FreeSwitchEvent {}
It's like pouring in functionality
trait ObjectBinding { def copyObject(source, target) { source.properties.each { key, value -> if (target.hasProperty(key) && !(key in ['class', 'metaClass', ''])) target[key] = value } return target } def copyMap(Map source, target) { source.each{ k, v -> try { target[k] = v } catch(e){log.error(e.message)} } return target }
I hope you enjoyed this solution. You can clone it here on github...
I will follow up on this with a fork directly to Scala. I will show you how case class pattern matching, Some/None; greatly reduce the code base.
Groovy & Grails Rules Engine
Grails Groovy Rules Engine Programming- * Extendable engine that can be used in any scenario.
- * Typeless rules that can be added or removed at runtime. "convention over configuration"
- * Decoupled decision that can ask for 1 or more rules engine results.
Design with a soldier's promotion/demotion implementation

Lets start with an interface to define the basic contract for a rules engine.
public interface IRulesEngine { def apply(obj) }
Here is a concrete base implementation of our rules engine. All of our business derived rules engines will extend this. Methods with the word "Rule" at the end will be executed when calling the apply() method.
class RulesEngine implements IRulesEngine { def getRules() { def rules = [] this.class.declaredFields.each { def field = this."${it.name}" if (!it.isSynthetic() && field instanceof Closure && it.name.endsWith("Rule")) { rules << it.name } } rules } def apply(obj) { Set responseSet = [] as Set rules.each { rule -> responseSet << this."$rule"(obj) } responseSet } }
We can start off with 2 engines. Ones which return promotable and demoteable traits.
class PromotableTraitsRulesEngineService extends RulesEngine { // example of a rule that returns many traits def heroOnBattlefieldRule = { soldier -> def traits = [] log.info("heroOnBattlefieldRule() ran") War*.campaigns*.battles.collect { battle -> battle.heros in soldier}.each { battle -> traits << """heroOnBattlefield - ${battle.campaign.war} ${battle.campaign}""" } return traits } }
class DemotableTraitsRulesEngineService extends RulesEngine { // example of a rule that returns many traits def insubordinationOnLeaveRule = { soldier -> def traits = [] log.info("insubordinationOnLeaveRule() ran") soldier.leaves.findAll{it.insubordination == true}.each { leave -> traits << """insubordinationOnLeave - ${leave.country} ${leave.city} ${leave.place}""" } return traits } // example of a rule that returns 1 traits def insubordinationDuringBattleRule = { soldier -> def traits = [] log.info("insubordinationDuringBattleRule() ran") def hasInsubordinationDuringBattleRule = War*.campaigns*.battles*.insubordinates.find { insubordinate -> insubordinate.soldier == soldier } if (hasInsubordinationDuringBattleRule) traits << "insubordinationDuringBattle" return traits } }
Now we can create a service that aggregates and applies these traits.
class PromotionRulesEngineService implements IRulesEngine { def promotableTraitsRulesEngineService def demotableTraitsRulesEngineService def apply( soldier ){ def traits = [] traits << promotableTraitsRulesEngineService.apply( soldier ) traits << demotableTraitsRulesEngineService.apply( soldier ) return traits } }
Lets get on to our decision already...
class PromotionService { enum Decision {PROMOTE, DEMOTE, NONE, DISHONORABLE_DISCHARGE} def promotionRulesEngineService def decide(soldier) { def traits = promotionRulesEngineService.apply(soldier) if (traits.collect{it == "insubordinationDuringBattle"}.count()) return Decision.DISHONORABLE_DISCHARGE if (traits.collect{it.contains "insubordinationOnLeave"}.count() < 10 && traits.collect{it.contains "heroOnBattlefield"}.count() > 0 ) return Decision.PROMOTE if (traits.collect{it.contains "insubordinationOnLeave"}.count() > 3 && traits.collect{it.contains "heroOnBattlefield"}.count() == 0 ) return Decision.DEMOTE return Decision.NONE } }I hope you enjoyed this solution. You can clone it here on github
Scala Actors with Traits
Scala Actors Traits Mixins Programmingcase class Heal(item:String) trait Healing { val handleHealingMessages = { case Heal(item) => println("I healed with " + item) } } case class Eat(item:String) trait Eating { val handleEatingMessages = { case Eat(item) => println("I ate " + item) } } case class Attack(item:String) class Soldier extends Actor with Healing with Eating { def handleMessages = { case Attack(item) => println("I'm attacking with my " + item) } def act() = { loop { react { /* order matters: if more than one trait handles the same message the first one in the orElse chain wins. I want my solder to choose "attack" over healing or eating */ handleMessages orElse handleHealingMessages orElse handleEatingMessages } } } } val soldier = new Soldier soldier.start soldier ! Attack("battle riffle") soldier ! Attack("pistol") soldier ! Attack("knife") soldier ! Heal("xstat sponges") soldier ! Eat("field ration")
Autonomous Flight
Aerial Footage DronesGrails / GORM findAllBy hasMany
Gorm Grails ProgrammingHave you ever seen this: "Exception Message: No value specified for parameter 1" as a result of asking a Entity for a set where its hasMany property is in a list?
You'd think asking like this would be enough...
BlogEntry.findAllByCategoriesInList(BlogCategory.findAllByTagInList(['Java','Foo']))
Turns out its not...
Here is one of many ways to solve this problem:
categoryList = ['Java','Foo'] def c = BlogEntry.createCriteria() def blogs = c.list { or { categoryList.each { item -> categories {eq("tag", item)} } } }
Happy Flying
Aerial Footage DronesComfortable with Java, but feeling Groovy
Technology Groovy Java Programmingdef list = ['a','b','a','c','a','a','d','e','d','d','d','d','d']
JAVA
Mapmap = new HashMap<>(); for (T t : list) { Integer val = map.get(t); map.put(t, val == null ? 1 : val + 1); } Entry max = null; for (Entry e : map.entrySet()) { if (max == null || e.getValue() > max.getValue()) max = e; } assert 'd' == max.getKey();
JAVAish...
def m = [:] list.each {m[it] = m.get(it,0)+1} assert 'd' == m.max{ it.value }.key
GROOVY
assert 'd' == list.max{Collections.frequency(list, it)}
Longer FPV
Technology Drones
The FPV live video feed to your phone uses 2.4ghz Wifi. Connected to your remote is a small range extender which connects to a camera on the Phantom 2 Vision/+. You can increase your FPV range by upgrading the antennas on your WiFi repeater and/or Vision camera. It's important to note that these upgrades can be done in several phases. Each incrementally increasing your range.
Upgrading the "pilot side" Wifi repeater

The following items are needed to perform this upgrade:
- Electric Drill, Drill Press or a Dremel
- U.FL Mini PCI to RP-SMA Pigtail Antenna WiFi Cable - available at amazon
- Industrial strength Velcro
Make sure to carefully remove the cover or you will break the connection to the battery.
Now that you have the repeater open you should be able to find the connection for the 2 internal antennas. You can upgrade 1 or both of them.
Drill a hole in the cover of the Wifi repeater so that you can mount the RP-SMA Pigtail antenna to the extender and replace the internal antenna. You can leave the internal antenna inside of the Wifi repeater.

Reassemble the Wifi repeater. Affix velcro to the top side of the Wifi Repeter and the bottom side of your LHCP antenna and attach the antenna to the newly installed RP-SMA Pigtail.

Now your FPV should be doubled by upgrading "pilot side" internal antenna's.
Upgrading the "phantom side" Wifi
The phantom drone has 2 antennas located inside the camera which provide FVP via 2.4ghz Wifi. The Wifi repeater on your remote makes a connection to the camera via these antennas.You will need to open up your camera with a allen wrench and replace 1 or both antennas.
Drill a hole in the back of the camera case and run a U.FL Mini PCI to RP-SMA Pigtail Antenna WiFi Cable. There are 2 screws on either side of the lens. Loosen those a bit so that a bit of play between the main-board and antenna mounts is available.
Remove the stock antenna mini pci connection.
Attach the newly installed mini pci to rp-sma cable to the main-board.
Tighten your camera lens mount screws.
Reassemble your camera.

Now you need to mount the newly installed antenna cable to the drone. I used my dremel to shape a child safety cabinet lock into a mount and attached it into the leg of the vision.


Upgrading Complete!!!

I now enjoy between 800-1500 meters depending on my flight environment.
You might have noticed I have a pilot side remote antenna upgrade. I will update this post with the 5.8ghz remote "pilot/driver" upgrades soon...